CC Switch
A cross-platform AI CLI management tool.
INFO
CC Switch is an open-source AI CLI manager designed to unify provider configuration, MCP servers, and prompt files across tools such as Claude Code, Codex, and Gemini CLI. It is useful for teams that switch between multiple AI coding assistants and want to avoid editing config files by hand.
Official Links
- GitHub repository: https://github.com/farion1231/cc-switch
- Releases: https://github.com/farion1231/cc-switch/releases
Core Features
Provider management
- Centralizes provider configuration across Claude Code, Codex, Gemini CLI, and similar tools
- Supports multiple endpoints and API keys for the same provider
- Useful when switching between multiple models and multiple platforms
MCP management
- Supports centralized MCP server configuration
- Helps reuse MCP settings across different CLI tools
- Common transport types include
stdio,HTTP, andSSE
Prompt management
- Supports centralized system prompt and preset management
- Can map to common prompt files such as
CLAUDE.md,AGENTS.md, andGEMINI.md - Useful for maintaining multiple team workflows
Multi-platform support
- Supports desktop installations
- Supports CLI usage
- Supports a Web version for headless or remote server environments
OmniRouters Integration
Setup Steps
Open the OmniRouters Keys page and create an API key.
Open the action menu for the target key and select
CC Switch.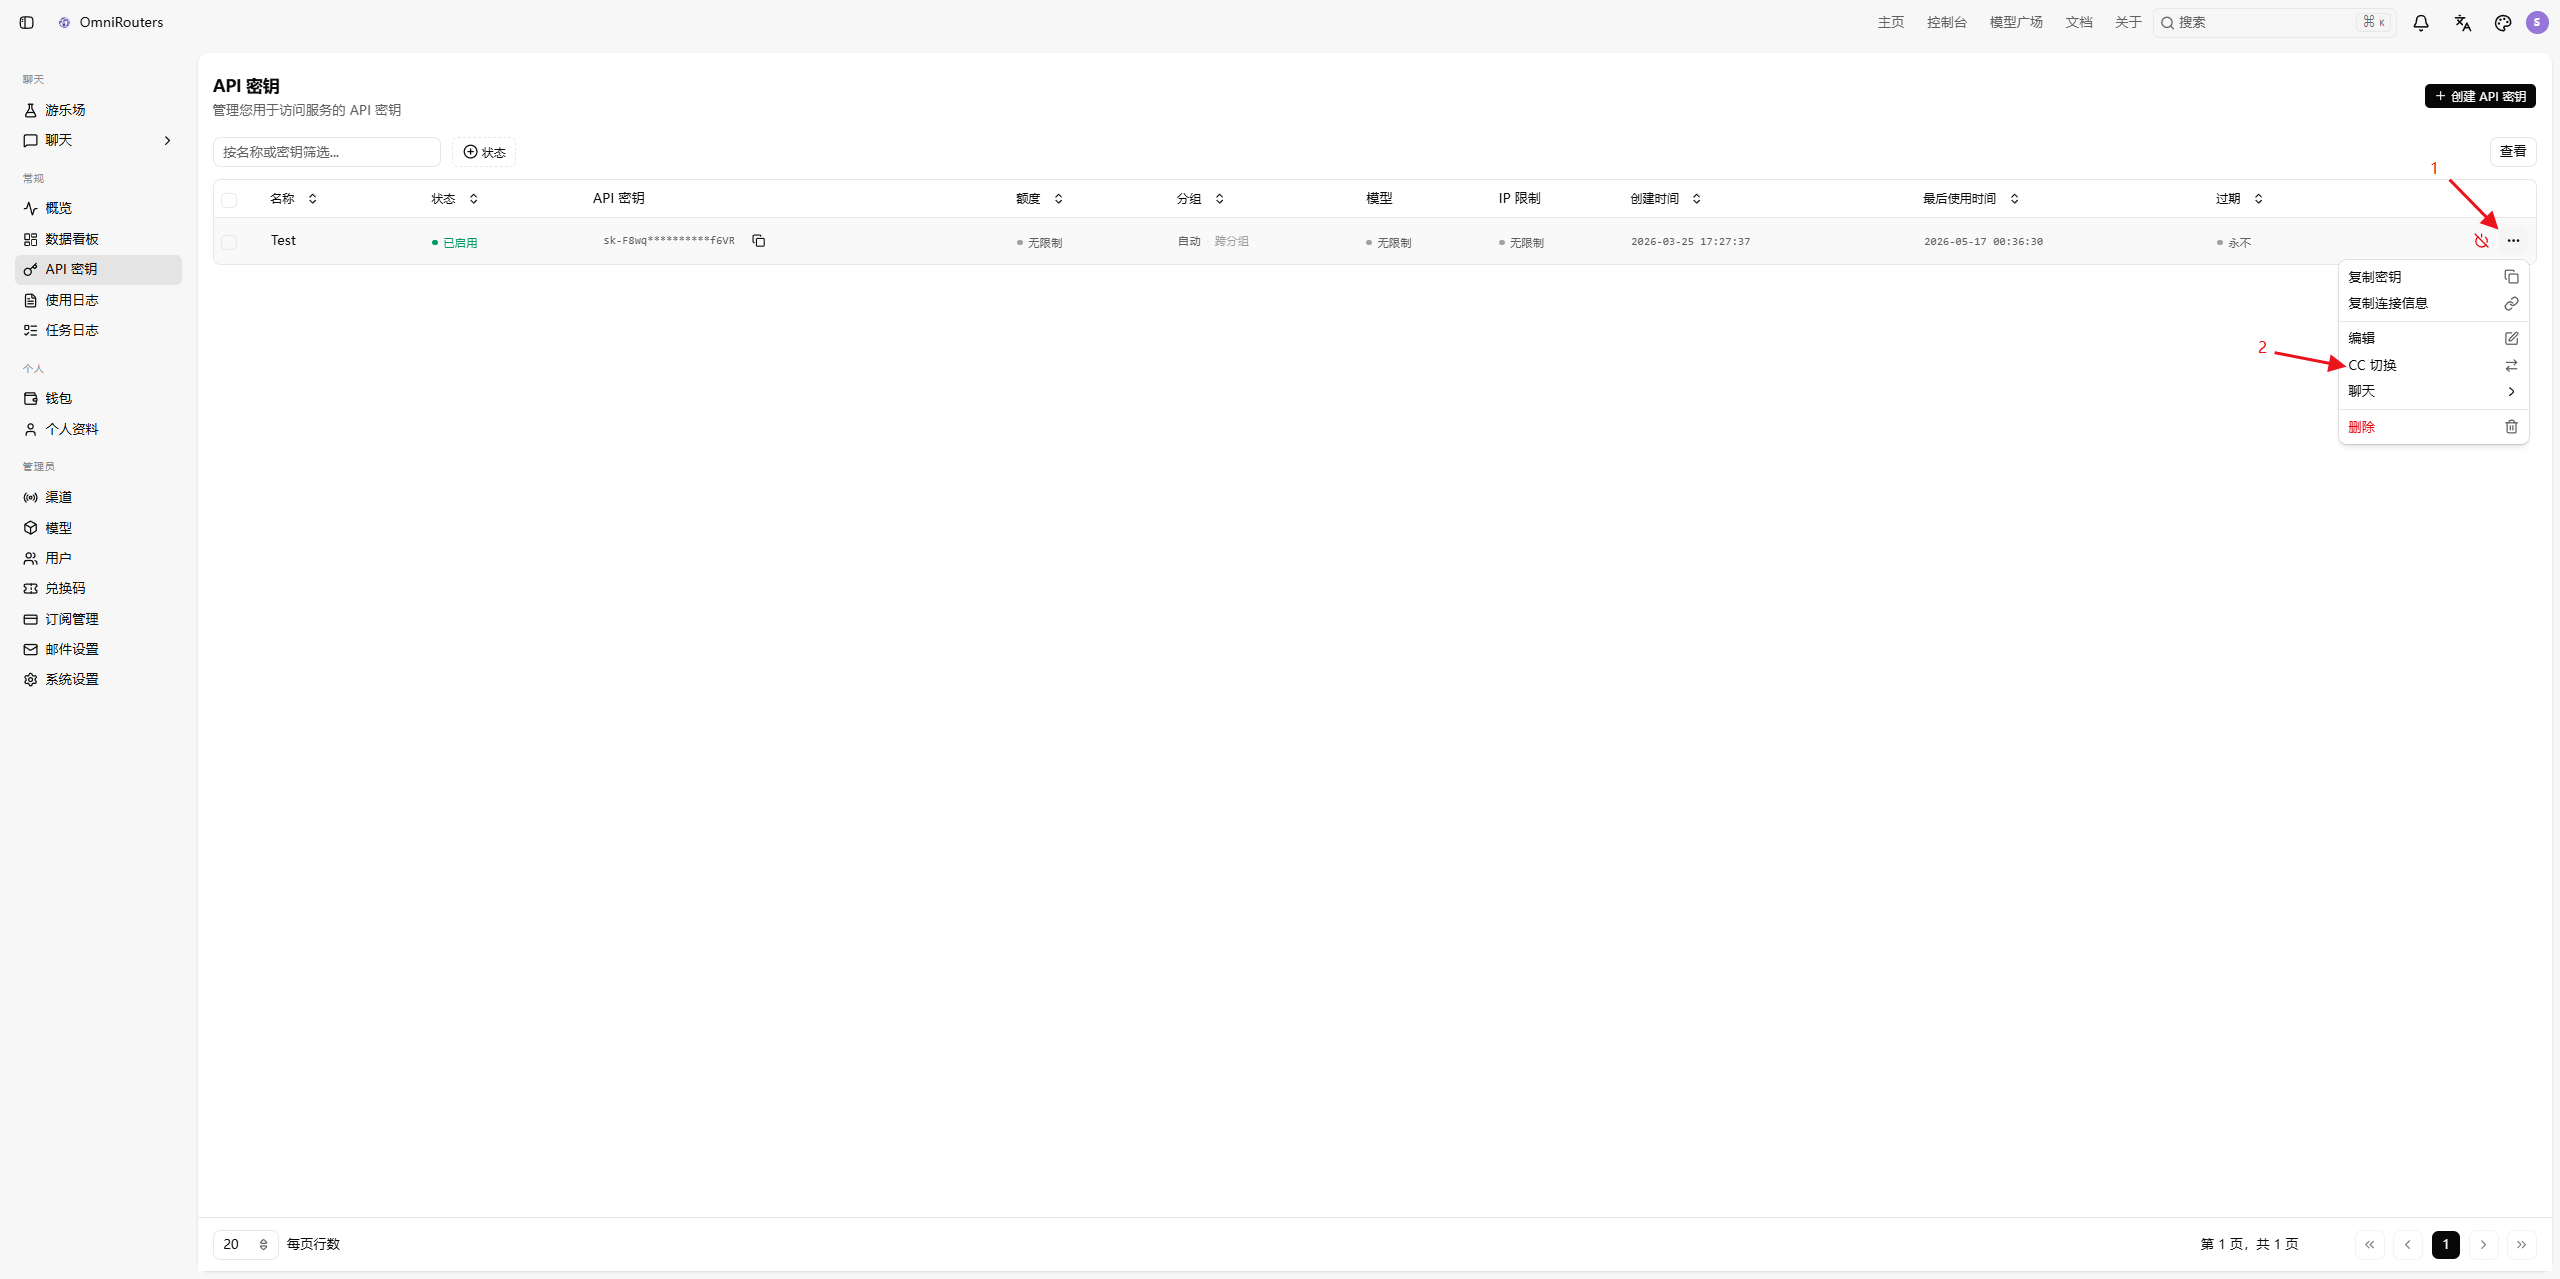
OmniRouters will open a
Fill in CC Switchdialog where you complete the target application and model mapping.
Dialog Field Reference
- Application: switch the target application at the top of the dialog between
Claude,Codex, andGemini - Name: enter a recognizable name for the configuration, such as
My Claude - Primary model: required, used as the default main model
- Haiku model: lightweight and fast model
- Sonnet model: balanced model
- Opus model: strongest model option
- All models are selected from dropdown lists; when nothing is chosen, the field shows “Please select a model”
Complete the Import
- After finishing the configuration, click
Open CC Switchto import the settings into CC Switch and start using them - If you do not want to continue, click
Cancelto close the flow without importing
Installation
macOS
If you use Homebrew, check whether the project still provides the latest cask-based installation:
brew tap farion1231/ccswitch
brew install --cask cc-switch
Windows
Download the .msi installer or portable .zip package from the Releases page.
Linux
Download the .deb package or .AppImage from the Releases page.
If you use an Arch-based distribution, you can also check whether the project provides a community package.
Web version
If you want to use CC Switch on a headless machine or over SSH, check the project releases for its Web build and access the local port from a browser after startup.
Recommendations
- Create the API key first, then start the
CC Switchflow from the key action menu - Make sure model names exactly match the names available in OmniRouters
- After the first import, validate connectivity with a simple test request in the target CLI
- If multiple teammates share configurations, define a consistent provider naming convention
- If you manage several CLIs at once, split your model mapping into primary, lightweight, and high-performance groups
Notes
- This page is an OmniRouters integration tutorial based on the public CC Switch project. It does not mean the project is officially maintained by OmniRouters.
- If CC Switch adds Deep Link import, one-click onboarding, or new provider flows in the future, the setup steps may change.